It is possible to add up to 5 labels to a customer. This can assist with identifying certain groups of customers, for example customers with a higher support requirement, a specific customer region, or customer specific interests.
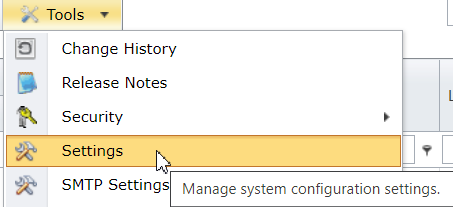
To enable customer labels, go to menu item [Tools] [Settings]
Then search for [customer field] and 2 x 5 setting fields will show. There are 5 fields that can be added to the customer, and for every field there is an option to have a drop-down list of 5 different values. If there is no drop down list enabled, the customer fields are free text.
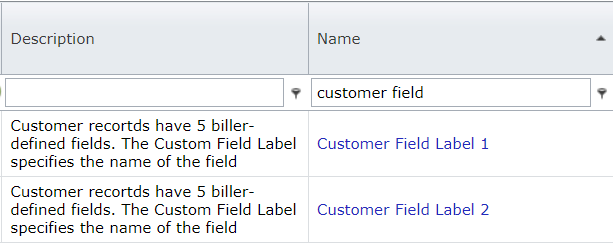
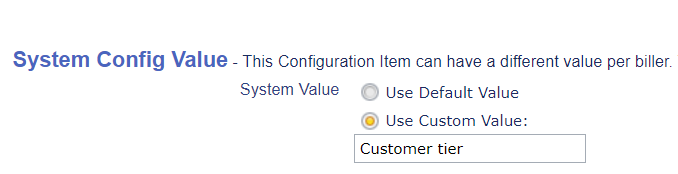
Select [Customer Field Label 1] to create the first customer field label. On the bottom of the screen select [edit]. This will bring up the option to configure this field. The default value is to not use this field. Change this to [Use Custom Value:] and then enter the name of the field to be added (in this case: customer tier).
Save the settings. If no drop- down list is required, go to the customer details screen to edit the customer and add a text in the new [customer tier] field.
If a drop-down list is required, stay in the settings screen and select [Customer Field Selection List 1] from the settings list.
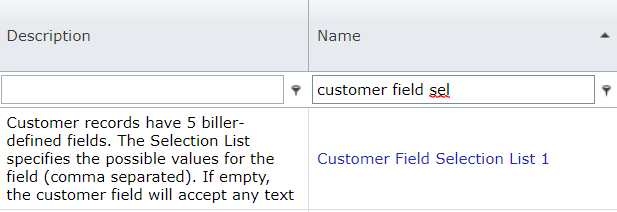
Once selected, it is possible to edit this (go to the bottom of the screen to edit these settings) and add custom values, with a maximum of 5. Separate them with a comma. In this example, the [Customer tier] field can have the values bronze, silver, gold, platinum or diamond.

Save these settings and go to the customer details screen. When editing the customer details, it is now possible to select the customer tier.
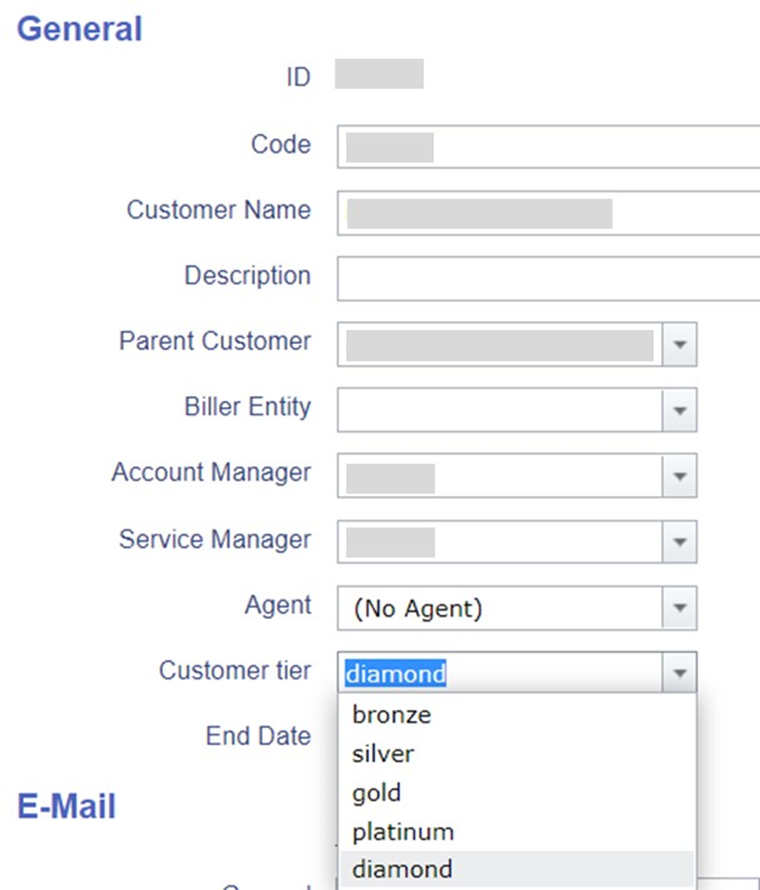
Save the customer details after selecting the correct setting.
Other example is adding a region with a drop-down field:

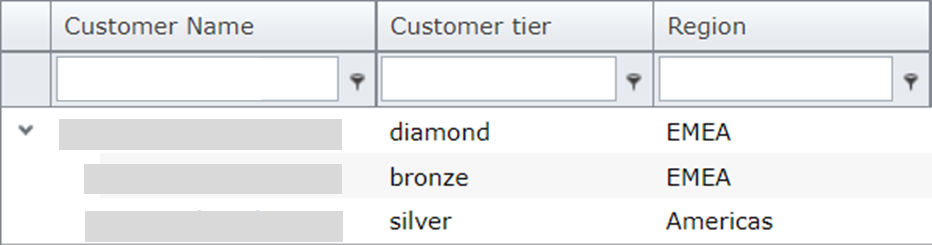
The customer field labels are not only visible on the customer details screen, they can also be included in the customers overview as an additional column, making it easy to search for customers with a certain label.