In order to provision Starlink kits, the following details are required:
- Kit ID – This is the terminal number in IBIS – please note that as there are no SIM cards, the Kit ID is used to populate the ICCID field.
Starlink kits can be imported from the Starlink portal, please see Import Starlink Kits.
In addition, the following needs to be in place:
- The kit must be assigned to the customer. This is done in the Card / Terminal Details screen.
- A site must exist for the customer.
- Confirmation from the end user of the requested price plan to activate on.
- A price plan is set up and is available for the customer (or the price plan is available to all customers).
Activating a Starlink Kit
Go to the terminal details screen and at the bottom of the page, select [Activate] or alternatively, navigate to:
Provisioning -> Starlink -> Activation Wizard
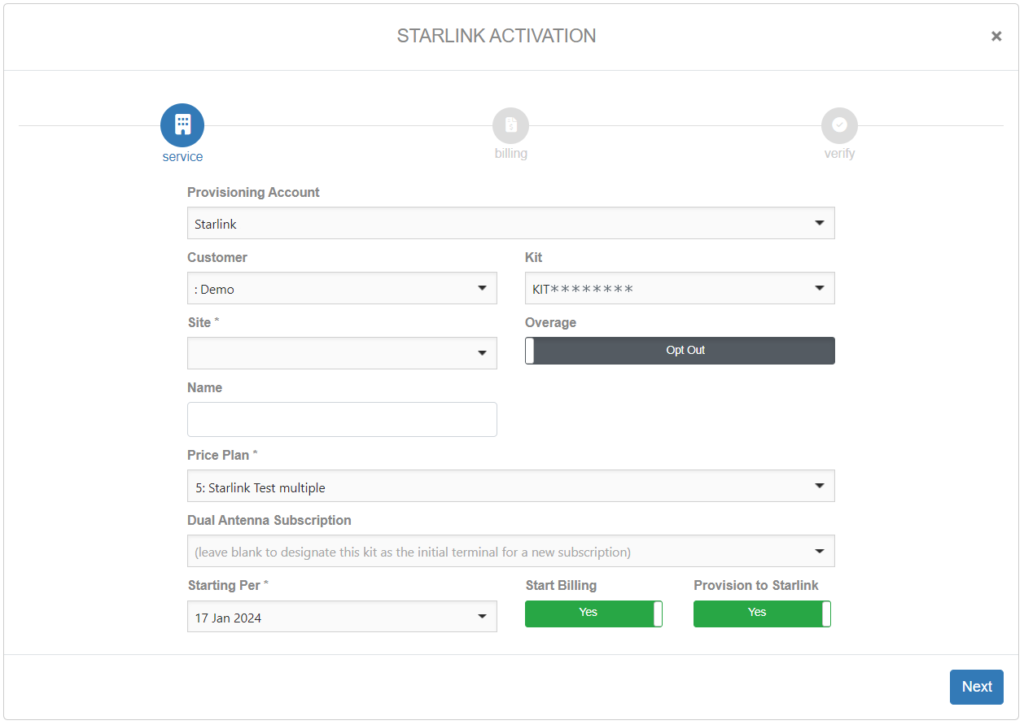
This will bring up the activation wizard. Mandatory fields that need to be populated during the activation process are:
- Provisioning Account
- Customer
- Kit ID (only kits associated with the selected customer are listed in the drop down)
- Site (only sites created under the selected customer are listed in the drop down)
- Overage opt-out/in for Priority data (opt-in is only available to roles with the Provisioning_StarlinkOptIn permission)
- Price plan
Optionally, provide a Name for the terminal.
The Starting Per date can be changed to a future date if required. (The Starting Per date cannot be set to a past date in the wizard but the subscription can be updated after the activation process to a past date if required.)
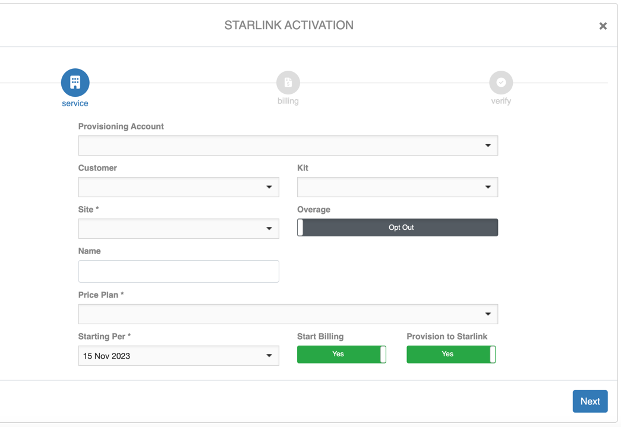
Opting-in to overages will impact how out of bundle charges are calculated. See Starlink Usage for details.
Select Start Billing to include this kit’s usage in IBIS billing for this customer.
Select Provision to Starlink to activate the kit on the Starlink portal.
Click [Next] to proceed with the activation.
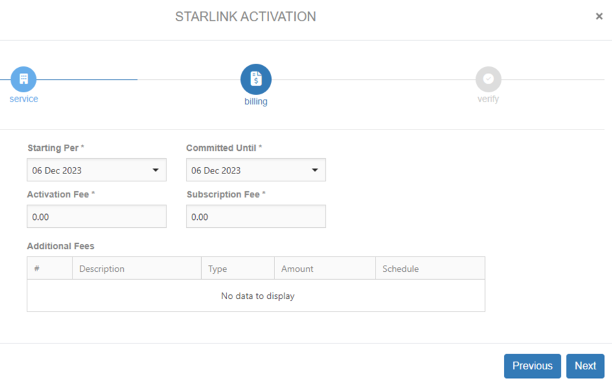
Fees are inherited from the price plan. Billing Administrators are able to update the fees.
Click [Next].
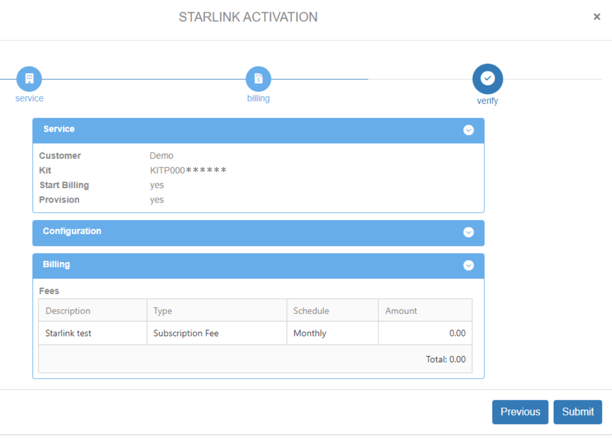
Check the details and use [Previous] to correct any mistakes.
Clicking [Submit] creates a provisioning task that generates a subscription and provisions the terminal on the Starlink portal (if selected in the Service tab).
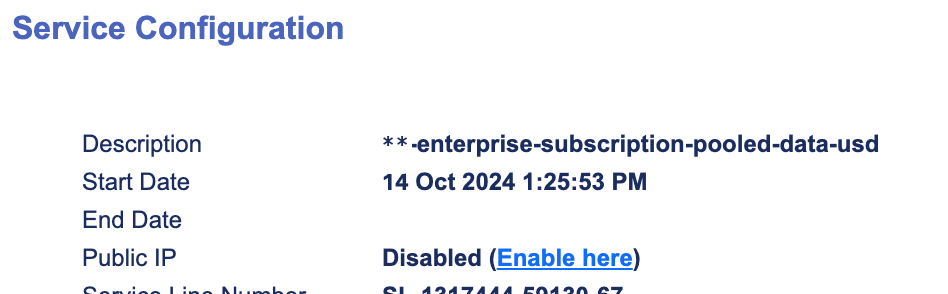
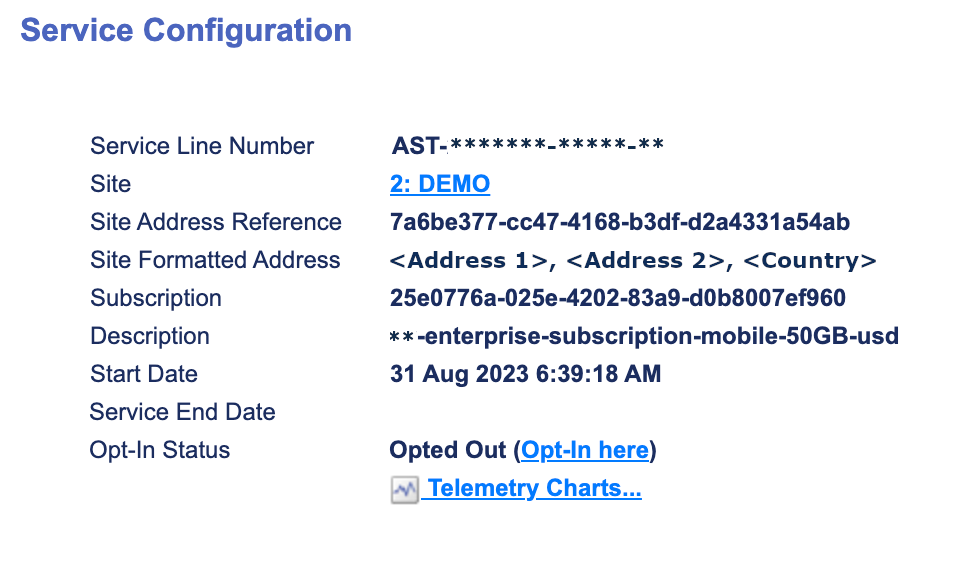
A Service Line Number is generated in the Starlink portal. The details can be viewed in the Service Configuration section in the Card / Terminal Details screen in IBIS.
Dual Antenna Activation
A second antenna can be activated against some price plans. The price plan must be based upon a service plan that allows dual antenna activations (see the section on Starlink Service Plans).
Follow the steps outlined above for Activating a Starlink Kit.
When a suitable price plan is selected in the activation wizard, a new field, Dual Antenna Subscription, is shown where an existing subscription can be selected for the second kit to be activated on.
Complete the activation process as outlined above.
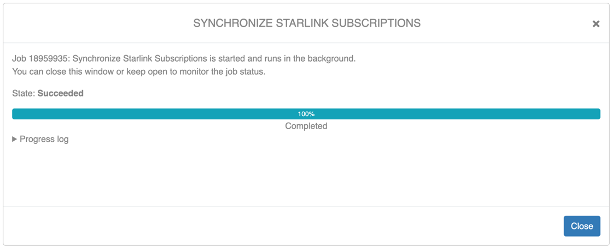
Synchronise Starlink Subscriptions
Subscription data is synchronised between Starlink portal and IBIS in the background. However, if you have difficulty activating a terminal or the Service Configuration data is not showing in the Card / Terminal Details screen it may be necessary to synchronise subscriptions subscriptions manually. Navigate to:
Provisioning –> Starlink –> Synchronize Starlink Subscriptions
Suspend a Terminal
A terminal is suspended by clicking [Suspend] in the Card / Terminal Details screen.
The suspend functionality disables the Service Line. Within 15 minutes or so, the terminal will be unable to generate further traffic. The Service Line remains, so billing will continue.
Resuming the terminal re-enables the Service Line.
Deactivate a Terminal
A terminal is deactivated by clicking [DeActivate] in the Card / Terminal Details screen.
The deactivate function cancels the Service Line. Within 15 minutes or so, the terminal will be unable to generate further traffic. At the end of the month billing is halted.
In order to ensure that advance deactivations are processed prior to the next period the setting prov_Starlink_AdvanceDeactivationMinutes is provided to ensure that the change is executed a little before midnight. By default, these operations happen one hour before midnight.
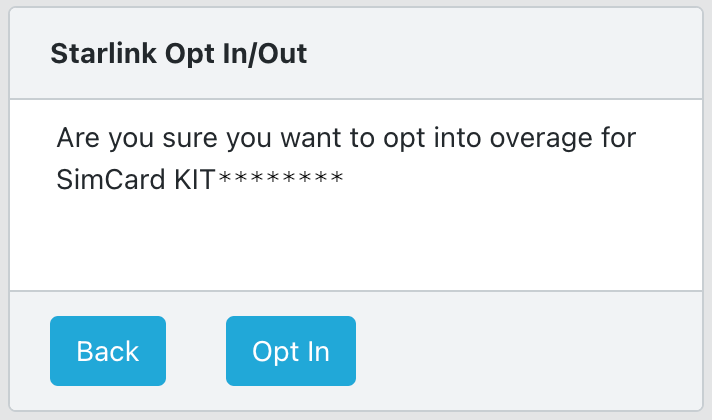
Change Overage Opt-in/out Selection
Load the kit in the Card / Terminal Details screen. In the Service Configuration section click on the link next to the Opt-in Status.
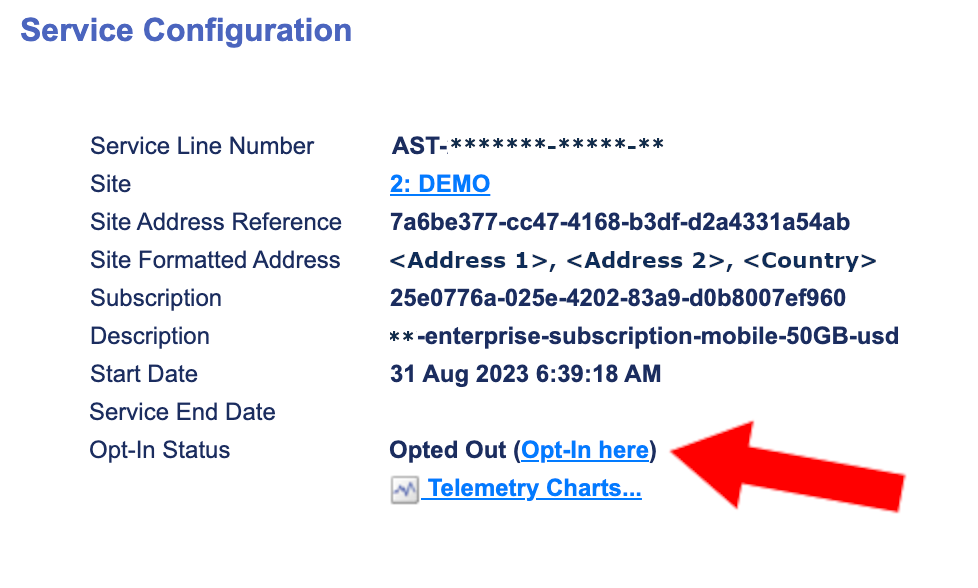
A pop-up is shown to confirm the change of the Opt-in Status.
Public IP Address
Enable or disable a kit’s public IP address in the Card / Terminal Details screen. In the Service Configuration section click on the ‘Enable here’/’Disable here’ link next to the Public IP.