Users can access IDP management via the bottom left of the terminal details page in IBIS.

The IDP Management screen consists of a number of widgets displaying terminal details, messages, and GPS reports.
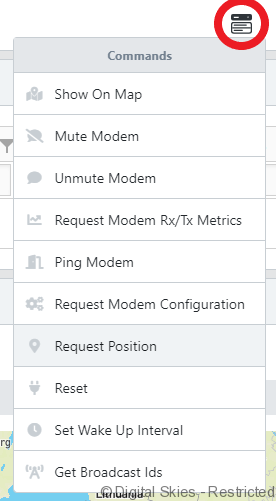
Action Menu
*The following features require an IDP RTM license, please contact salessupport@g1sat.com for further information.
Use the [Action menu] to send all available commands to the terminal.
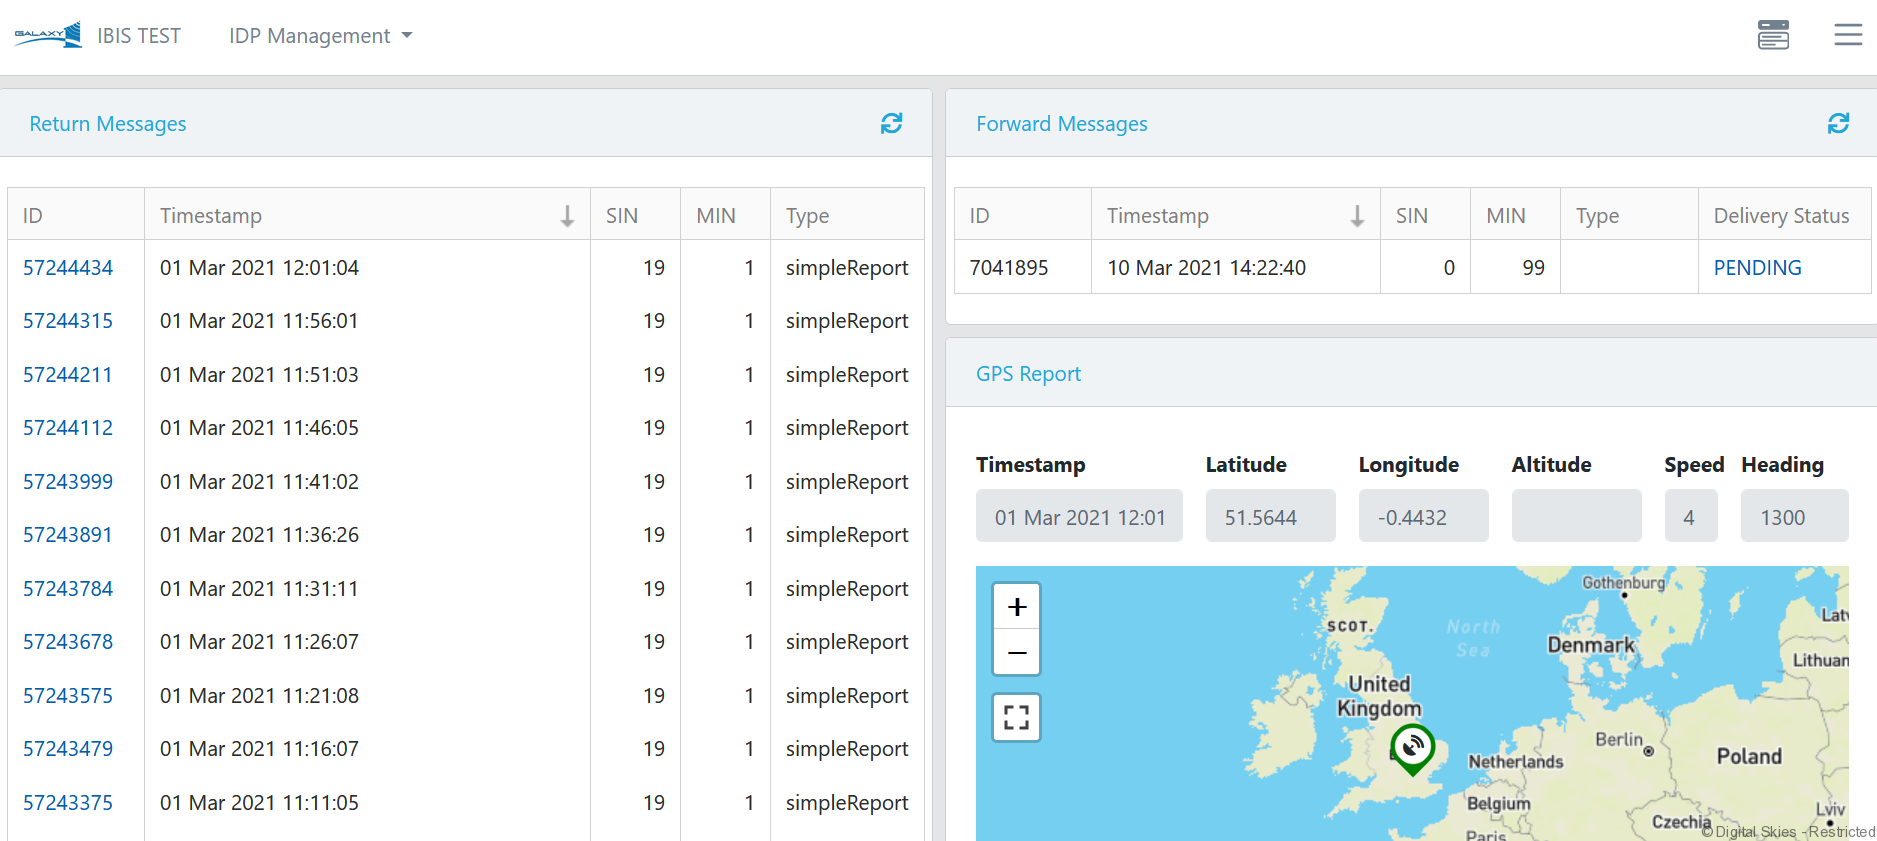
When sending a command, such as ping or request metrics, the request will show in the [Forward Messages] widget.

And the response will show in the [Return Messages] widget.

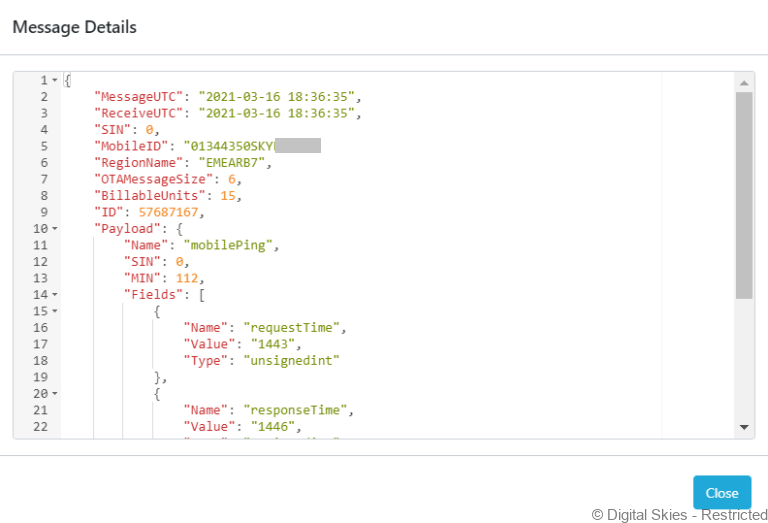
Click the [message ID] to get the raw JSON message content that provides more information from the return message, such as the request and response time in a ping.
Commands typically take 1-3 minutes to receive a response, provided the terminal is connected to the network without a wake-up period. Terminal responses will take longer if they are configured with a wake-up period, where the terminal remains in low power mode until it’s scheduled to send/receive messages up to every hour.
The delivery status is shown in the [Forward Messages] widget. The request will time out and change status to the [delivery failed] if there is no response within 10 minutes + wake up period.
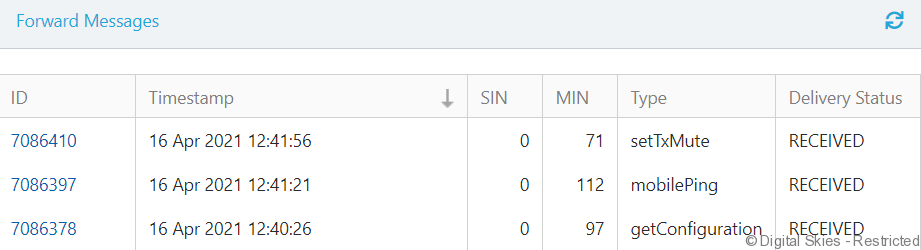
Use the [refresh button] in the top right of the widget to refresh the latest messages and message status.
Commands
[Ping] – Send a ping to the terminal.
Use the [Ping] command to determine whether the terminal is connected to the network.
[Mute/Unmute] – Mute/unmute the terminal.
Use the [Mute/Unmute] command to change the terminal’s mute state.
The mute function is a terminal state that stops scheduled messages from being sent from the terminal. When a terminal is muted on the network it will still respond to most messages for example, Pings.
If a terminal is muted on the network it will show up as [UserTXstate = 5] in the modem registration or request configuration return messages.
[Request configuration] – Request the terminal configuration details.
The request configuration provides the same information found in modem registration, this includes: hardware and software versions, wake up period, last reset reason, and user TX state.
Both modem registration and request configuration messages update the relevant fields in the terminals status details widget.
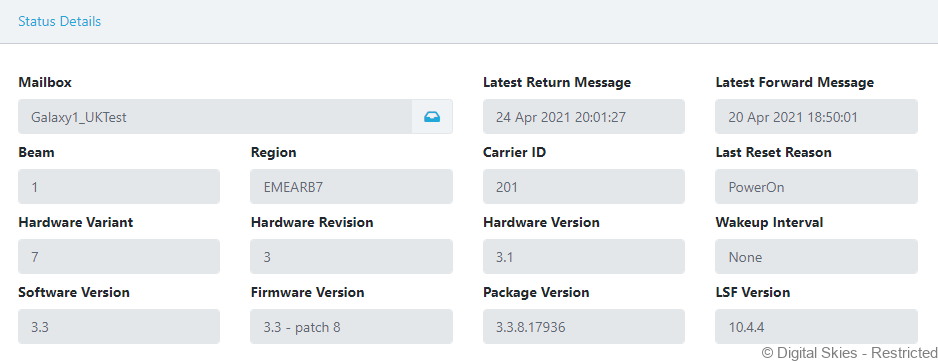
Use [last reset reason] to provide details on why the terminal last restarted, the reset reason can provide indications of error such as low power.
Open the message to check the [User TX state] value to confirm if the terminal is currently muted on the network.
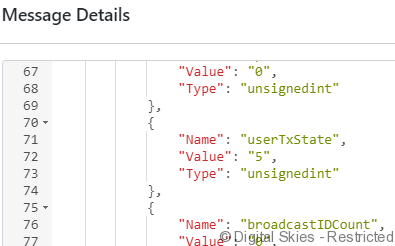
User TX state “0” = The terminal is not muted
User TX state “5” = The terminal is muted
[Request Rx Metrics] – Request the receive (forward message) metrics from the terminal.
Use [Rx Metrics] to look at the following stats: C/N0 (Carrier to noise ratio/Signal strength), amount of packets vs successful [ok] packets sent from the terminal, on periods up to the last full day.
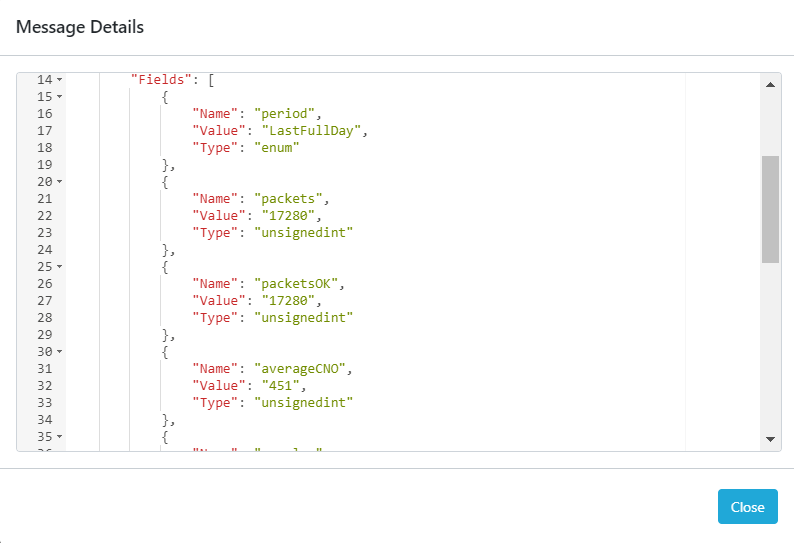
Use [Average C/No value] (carrier-to-noise-density ratio) to view the average signal strength over the requested period. Place the decimal between the second and third value to get the signal strength. In the above example, the signal strength [averageCNO] is 45.1.
38.0 is the minimum recommended signal strength for IDP
40.0 + indicates a good signal strength on the network
[Tx Metrics] – Request the transmit (return message) metrics from the terminal.
Terminal transmit metrics are used to request the return message metrics on periods up to the last full day. Use [Tx Metrics] to confirm the amounts of packets sent, successful packets [ok], and check for any errors.
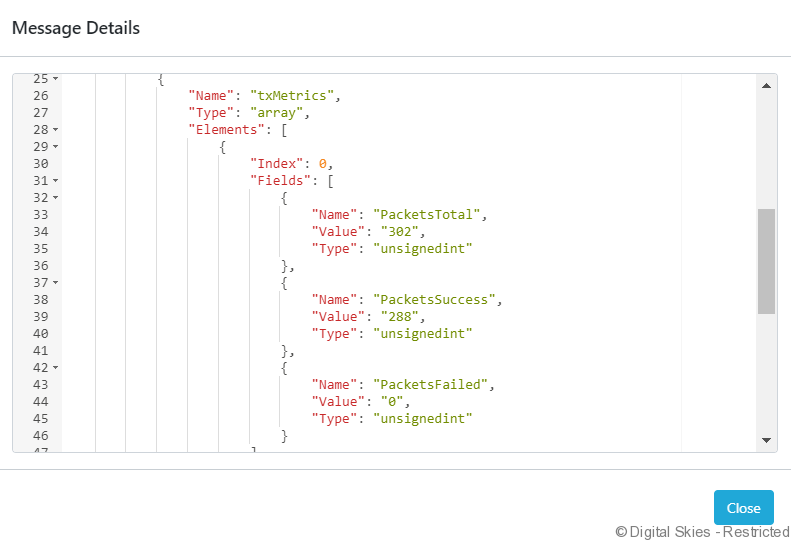
Note: Requesting metrics against a full day will respond with no value if the terminal doesn’t hold a complete day of data. If this occurs request the Tx data over a shorter period.
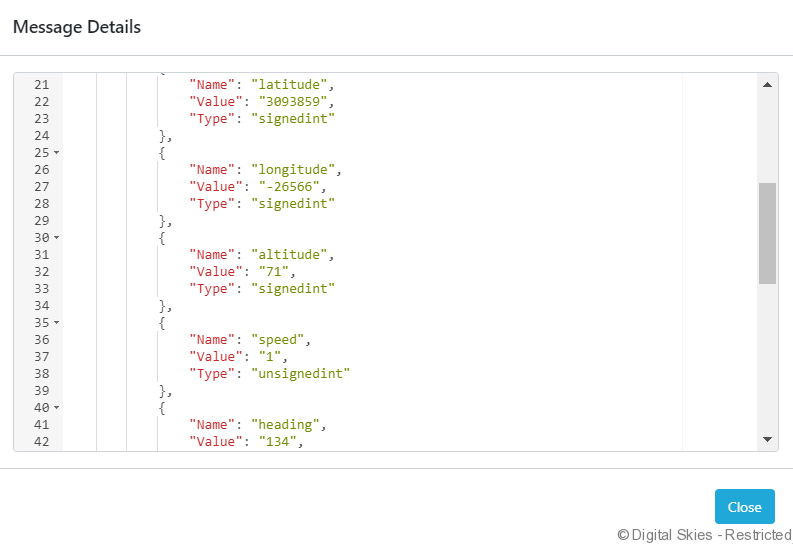
[Request position] – Request the latest GPS and tracking information from the terminal.
Position updates include LAT/Long, altitude, speed, and heading. Position updates update the terminal location in the GPS report widget and in [Show On Map].
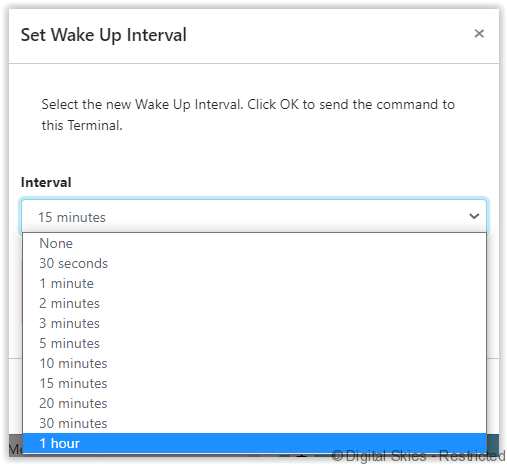
[Set wake-up interval] – Set the scheduled wake-up on the terminal.
IDP terminals can be configured in low power mode to only send and receive messages at scheduled wake-up periods. Use the [set wake-up period] command to adjust this schedule from none to every hour.
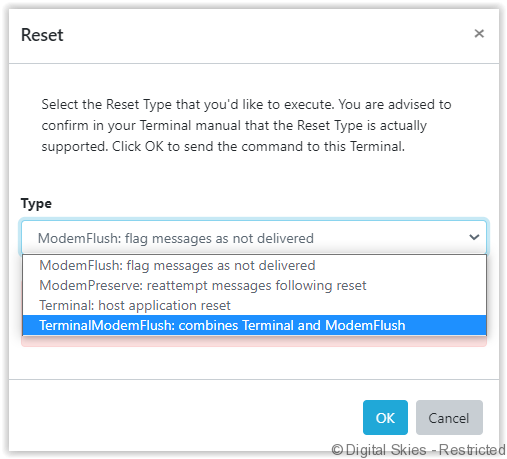
[Reset] – Reset the terminal at the modem or terminal level.
Use the [Reset] command to reset the terminal on a modem or terminal level. Users have several options to flush messages or reset the application.
[Get broadcast IDs] – Get the broadcast Ids from the terminal.
Broadcast IDs can be used to send group messages to any terminal assigned to the broadcast ID. Use [GetBroadcast IDs] to confirm the broadcast groups that are assigned to the specific terminal.
Bulk commands
Users can send bulk commands to multiple terminals using the [Action menu] on the terminals overview screen.

In the terminals overview, the [Action menu] is only displayed when one or multiple terminals are selected.
Maps and tracking
The [GPS report] widget in the terminal screen shows the last recorded location of the terminal.
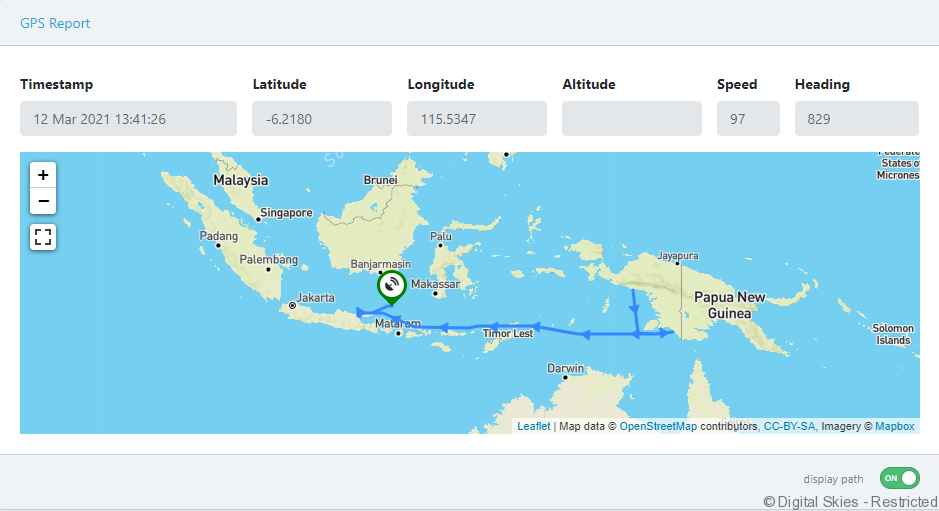
Click [Display path] on the [GPS report] widget to display the tracking based on terminal position reports and scheduled messages, provided they contain the latitude and longitude fields.
GPS positions are only recorded on the map when the new and previous locations are more than 35 meters apart.
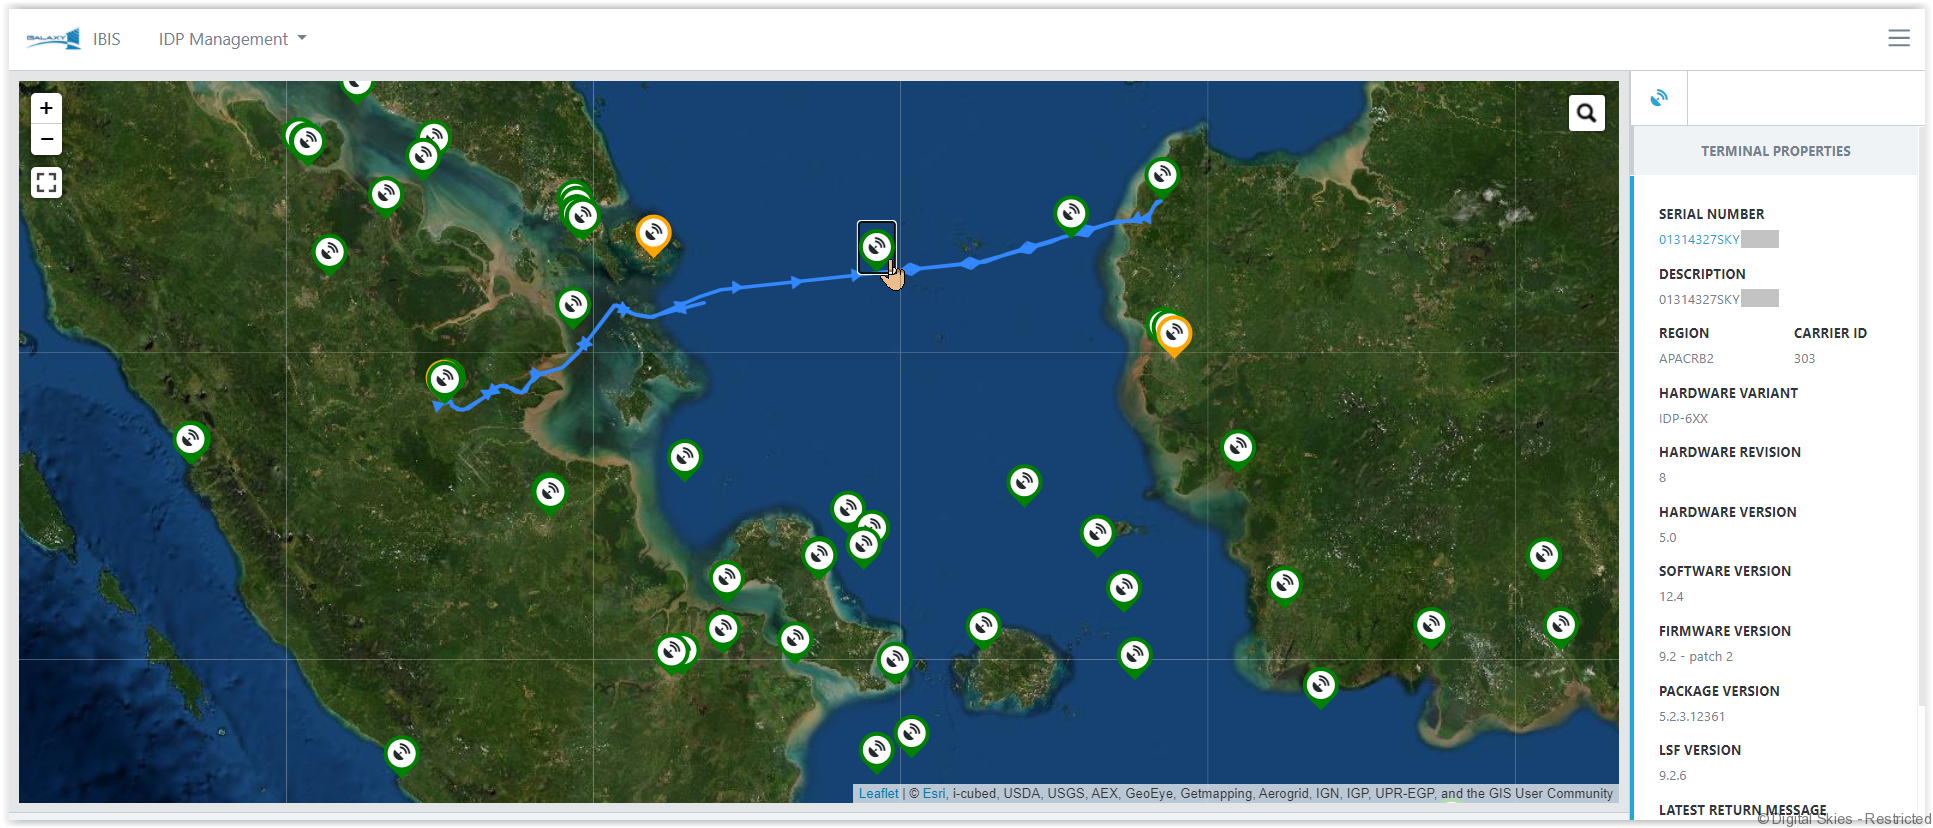
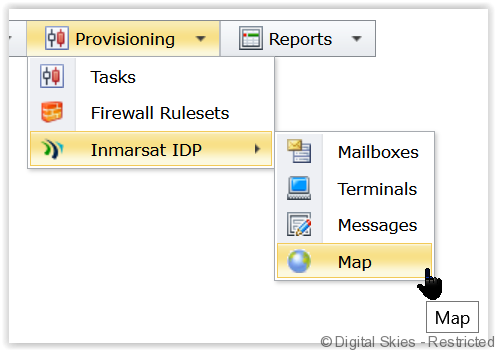
Open the IDP Management Map page, or [Show on Map] in the [Action menu] to view IDP terminals in the map view.
Click on any [Terminal icon] on the map to view the terminal properties